Getting Started
Welcome to RavenDB!
This article will get you started and guide you through all the aspects of RavenDB needed for basic understanding and a simple setup.
Server
Let's start by installing and configuring the server. To do that, first we need to download the server package from the downloads page.
RavenDB is cross-platform with support for the following operating systems:
- Windows x64 / x86
- Linux x64
- Docker
- MacOS
- Raspberry Pi
Prerequisites
RavenDB is written in .NET so it requires the same set of prerequisites as .NET.
Windows
Please install Visual C++ 2015 Redistributable Package
(or newer) before launching the RavenDB server.
This package should be the sole requirement for the 'Windows' platforms.
If you're experiencing difficulties, please check the
prerequisites for .NET on Windows in this Microsoft article.
Linux
We highly recommend updating your Linux OS prior to launching the RavenDB server.
Also, please check the prerequisites for .NET on Linux in this Microsoft article.
MacOS
We highly recommend updating your MacOS and checking the prerequisites for .NET on macOS in this Microsoft article before launching the RavenDB Server.
Installation & Setup
Highly Available Clusters
We recommend setting up your cluster nodes on separate machines so that if one goes down, the others can keep the cluster active.
-
Set up a server folder on each machine that will host the nodes in your cluster. You may want to include the node designation (nodes A, B, C...) in the name of each server folder, to prevent future confusion.
-
Extract the server package into permanent server folders on each machine.
Each folder that contains an extracted server package will become a functional node in your cluster.
If you've set up on separate machines, go to step 3 below.
Important:
If you move this folder after installation, the server will not run.
You'll receive a 'System.InvalidOperationException: Unable to start the server.' error because it will look for the file path that is set
when you install. If you must move your folder at a later time, you can reconfigure the certificate file path
in the settings.json file.
If you choose to use only one machine (although this will increase the chances of your cluster going down) you'll need to:
- Set up a parent folder in a permanent location for your installation package and server settings for the next steps.
-
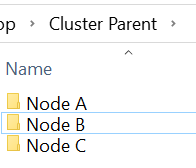
Set up separate folders in the parent folder for each node and keep it in a safe place for future use.

-
Extract the downloaded
RavenDB...zipserver package into each node folder. - If you want to install the cluster as a service (it will improve availability because it will automatically run in the background every time your machine restarts), this simple step will be done after initial secure installation via the Setup Wizard or manually. Read Running as a Service.
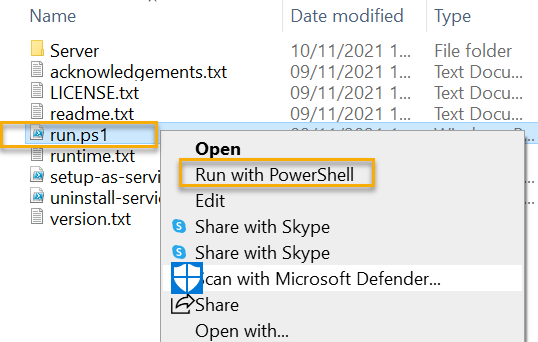
- Start the Setup Wizard by running
run.ps1(orrun.shin Linux) in PowerShell or disable the 'Setup Wizard' and configuring the server manually.

Running in a Docker container
If you are interested in hosting the server in a Docker container, please read our dedicated article.
Running in a VM
If you are interested in hosting the server on a VM, please refer to
Running in RavenDB Cloud
If you want to test RavenDB without manual setup try RavenDB Cloud. We offer one free instance per customer. For more information, please read our dedicated article.
Help Us Improve Prompt
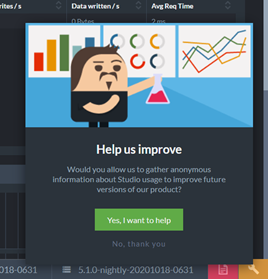
When you first launch RavenDB, you will see this prompt asking if you'd be willing to anonymously share some Studio usage data with us in order to help us improve RavenDB:

Help Us Improve
Once you respond to this prompt, it should not appear again. However, in some scenarios, such as running RavenDB embedded, or working without browser cookies, the prompt may appear again.
If necessary, you can add this flag to the Studio URL to prevent the prompt from appearing:
<Studio URL>#dashboard?disableAnalytics=true
Configuration
The RavenDB server uses a settings.json file in each node Server folder to store the server-wide configuration options.
When starting a server, RavenDB will look for the settings.json file in the node Server folder, so it must be located there.
The Setup Wizard places it correctly automatically.
After making changes to this file, a server restart is required for them to be applied.
You can read more about the available configuration options in our dedicated article.
Default configuration
The configuration file included in each RavenDB server distribution package is as follows:
{
    "ServerUrl": "http://127.0.0.1:0",
    "Setup.Mode": "Initial",
    "DataDir": "RavenData"
}
This means that the server will run:
- On
localhostwith arandom port - In
Setup Wizardmode - Store the data in the
RavenDatadirectory.
Port in Use
In some cases, the port might be in use. This will prevent the Server from starting with an "address in use" error (EADDRINUSE).
The port can be changed by editing the ServerUrl value in the settings.json file.
For a list of IPs and ports already in use, run netstat -a in the command line.
Write Permissions
RavenDB requires write permissions to the following locations:
- The folder where RavenDB server is running (to update settings.json by the Setup Wizard)
- The data folder (
DataDirsetting) - The logs folder (
Logs.Pathsetting)
If you intend to run as a service, the write permissions should be granted to the user running the service (e.g. "Local Service").
Studio
Free
Our GUI, the RavenDB Management Studio, comes free with every license type:
- Community
- Professional
- Enterprise
After installation and setup, the Studio can be accessed via the browser using the ServerUrl or the ServerPublicUrl value e.g. http://localhost:8080.
Whenever you run the server folder script run.ps1 the Studio opens automatically in your browser.
Security Concerns
We recommend using the 'Setup Wizard' to easily install RavenDB securely from the very start to prevent potential future vulnerability.
The process in RavenDB only takes a few minutes and is free.
To let a developer start coding an application quickly, RavenDB will run with the following default security mode:
Default Security Mode
As long as the database is used inside the local machine and no outside connections are allowed, you can ignore security concerns and you require no authentication. Once you set RavenDB to listen to connections outside your local machine, your database will immediately block this now vulnerable configuration and require the administrator to properly set up the security and access control to prevent unauthorized access to your data or to explicitly allow the unsecured configuration.
We recommend using the 'Setup Wizard' to easily install RavenDB securely from the very start to prevent potential future vulnerability. The process takes a few minutes and is free.
Read more about security and how to enable authentication here.
Client
After your server is up and running, to write an application you need to acquire one of the Client access libraries:
DocumentStore
In order to start, you need to create an instance of the DocumentStore - the main entry point for your application which is responsible for establishing and managing connections between a RavenDB server (or cluster) and your application.
Examples
Before proceeding to the examples, we would like to point out that most of the articles are using the Northwind database. You can read more about it and how to deploy it here.
using (IDocumentStore store = new DocumentStore
{
    Urls = new[]                        // URL to the Server,
    {                                   // or list of URLs
        "http://live-test.ravendb.net"  // to all Cluster Servers (Nodes)
    },
    Database = "Northwind",             // Default database that DocumentStore will interact with
    Conventions = { }                   // DocumentStore customizations
})
{
    store.Initialize();                 // Each DocumentStore needs to be initialized before use.
                                        // This process establishes the connection with the Server
                                        // and downloads various configurations
                                        // e.g. cluster topology or client configuration
}
try (IDocumentStore store = new DocumentStore(
new String[]{ "http://live-test.ravendb.net" }, // URL to the Server,
// or list of URLs
// to all Cluster Servers (Nodes)
"Northwind") // Default database that DocumentStore will interact with
) {
DocumentConventions conventions = store.getConventions(); // DocumentStore customizations
store.initialize(); // Each DocumentStore needs to be initialized before use.
// This process establishes the connection with the Server
// and downloads various configurations
// e.g. cluster topology or client configuration
}import { DocumentStore } from "ravendb";
const store = new DocumentStore(
["http://live-test.ravendb.net"], // URL to the Server
// or list of URLs
// to all Cluster Servers (Nodes)
"Northwind"); // Default database that DocumentStore will interact with
const conventions = store.conventions; // DocumentStore customizations
store.initialize(); // Each DocumentStore needs to be initialized before use.
// This process establishes the connection with the Server
// and downloads various configurations
// e.g. cluster topology or client configuration
store.dispose(); // Dispose the resources claimed by the DocumentStoreSingleton
The DocumentStore is capable of working with multiple databases.
For proper operation, we recommend having only one DocumentStore instance per application.
The following articles can extend your knowledge about the DocumentStore and its configuration:
- What is a Document Store?
- How to Create a Document Store?
- How to Setup a Default Database?
- How to configure the Document Store using Conventions?
Session
The Session is used to manipulate the data. It implements the Unit of Work pattern and is capable of batching the requests to save expensive remote calls. In contrast to a DocumentStore it is a lightweight object and can be created more frequently. For example, in web applications, a common (and recommended) pattern is to create a session per request.
Example I - Storing
RavenDB is a Document Database. All stored objects are called documents. Each document contains a unique ID that identifies it, data and adjacent metadata, both stored in JSON format. The metadata contains information describing the document, e.g. the last modification date (@last-modified property) or the collection (@collection property) assignment.
using (IDocumentSession session = store.OpenSession())  // Open a session for a default 'Database'
{
    Category category = new Category
    {
        Name = "Database Category"
    };

    session.Store(category);                            // Assign an 'Id' and collection (Categories)
                                                        // and start tracking an entity

    Product product = new Product
    {
        Name = "RavenDB Database",
        Category = category.Id,
        UnitsInStock = 10
    };

    session.Store(product);                             // Assign an 'Id' and collection (Products)
                                                        // and start tracking an entity

    session.SaveChanges();                              // Send to the Server
                                                        // one request processed in one transaction
}
try (IDocumentSession session = store.openSession()) { // Open a session for a default 'Database'
Category category = new Category();
category.setName("Database Category");
session.store(category); // Assign an 'Id' and collection (Categories)
// and start tracking an entity
Product product = new Product();
product.setName("RavenDB Database");
product.setCategory(category.getId());
product.setUnitsInStock(10);
session.store(product); // Assign an 'Id' and collection (Products)
// and start tracking an entity
session.saveChanges(); // Send to the Server
// one request processed in one transaction
}const session = store.openSession(); // Open a session for a default 'Database'
const category = new Category("Database Category");
await session.store(category); // Assign an 'Id' and collection (Categories)
// and start tracking an entity
const product = new Product(
"RavenDB Database",
category.Id,
10);
await session.store(product); // Assign an 'Id' and collection (Products)
// and start tracking an entity
await session.saveChanges(); // Send to the Server
// one request processed in one transactionExample II - Loading
The Session was designed to help the user write efficient code easily. For example, when a document is being loaded (.Load) from the server, there is an option to retrieve additional documents in the same request (using .Include), minimizing the number of expensive calls.
Besides that, the session implements the Unit of Work pattern, meaning that all changes to loaded entities are automatically tracked. The SaveChanges call will synchronize (with the server) only the documents that have changed within the session. All of those changes are sent in one request (saving network calls) and processed in one transaction (you can read why RavenDB is an ACID database here).
using (IDocumentSession session = store.OpenSession())  // Open a session for a default 'Database'
{
    Product product = session
        .Include<Product>(x => x.Category)              // Include Category
        .Load(productId);                               // Load the Product and start tracking

    Category category = session
        .Load<Category>(product.Category);              // No remote calls,
                                                        // Session contains this entity from .Include

    product.Name = "RavenDB";                           // Apply changes
    category.Name = "Database";

    session.SaveChanges();                              // Synchronize with the Server
                                                        // one request processed in one transaction
}
try (IDocumentSession session = store.openSession()) { // Open a session for a default 'Database'
Product product = session
.include("Category") // Include Category
.load(Product.class, productId); // Load the Product and start tracking
Category category = session
.load(Category.class, // No remote calls,
product.getCategory()); // Session contains this entity from .include
product.setName("RavenDB"); // Apply changes
category.setName("Database");
session.saveChanges(); // Synchronize with the Server
// one request processed in one transaction
}const session = store.openSession(); // Open a session for a default 'Database'
const product = await session
.include("Category") // Include Category
.load(productId); // Load the Product and start tracking
const category = await session
.load(product.Category); // No remote calls,
// Session contains this entity from .include
product.Name = "RavenDB"; // Apply changes
category.Name = "Database";
await session.saveChanges(); // Synchronize with the Server
// one request processed in one transactionExample III - Querying
To satisfy queries, indexes are used. From the querying perspective, an index defines which document fields can be used to find a document. The whole indexing process is done asynchronously, which gives very quick querying response times, even when large amounts of data have been changed. However, an implication of this approach is that the index might be stale.
When no index is specified in the query (like in the query below), RavenDB will use its intelligent auto-indexes feature that will either use an already existing index or create a new one if no match is found.
The other option is to write the index yourself and deploy it to the server. Those indexes are called Static Indexes.
Behind the scenes, queries are translated to the Raven Query Language (RQL) syntax. Read more about RQL here.
using (IDocumentSession session = store.OpenSession())  // Open a session for a default 'Database'
{
    List<string> productNames = session
        .Query<Product>()                               // Query for Products
        .Where(x => x.UnitsInStock > 5)                 // Filter
        .Skip(0).Take(10)                               // Page
        .Select(x => x.Name)                            // Project
        .ToList();                                      // Materialize query
}
try (IDocumentSession session = store.openSession()) { // Open a session for a default 'Database'
List<String> productNames = session
.query(Product.class) // Query for Products
.whereGreaterThan("UnitsInStock", 5) // Filter
.skip(0).take(10) // Page
.selectFields(String.class, "Name") // Project
.toList(); // Materialize query
}const session = store.openSession(); // Open a session for a default 'Database'
const productNames = await session
.query({ collection: "Products" }) // Query for Products
.whereGreaterThan("UnitsInStock", 5) // Filter
.skip(0).take(10) // Page
.selectFields("Name") // Project
.all(); // Materialize queryfrom Products
where UnitsInStock > 5
select Name